Showing posts with label Decor. Show all posts

Sunday, August 4, 2013

Will's Nursery

It's been a great while since I checked in.  Will is 4 months old, I'm back at work, the garden is finally coming in, and life is just hectic.  But we are trying to do some fun things this summer with Sam as a family, so that is fun too. 

I was home from work with Sam the other day, so I took a little time and photographed Will's nursery.  There is one more project I'd like to do for over his crib and the curtains still haven't been hemmed, but I figured I needed to get some pictures anyways.


This room is impossible to photograph with my regular lens, but I tried my best.  I didn't style much since I was doing this while at home with a sick kid (he's fine now).  It's a small room, but perfect for a nursery.  The walls are Analytical Gray by Sherwin Williams.  It is a perfect warm but not pink gray and works really well with the stained trim (bane of my existence).  For reference, here's my original mood board for the nursery.

I did get the stuffed puppy (it's made by Jellycat), and I sewed the quilt (in this post).  The rocker turned out different - I used my great grandma's glider but didn't get around to reupholstering it.  It works with the existing faux leather for now.


I love the gallery wall.  Love, love.  The top left picture is one I drew when I was 5 years old - my cousin found it and gave it to me for Christmas.   The frames are Ikea and Michaels and Target.  The clock was from Lowes.  The Fe canvas I made using a DIY image transfer method.  The footprint canvas is Will's one-month footprint.  The W is from Michaels - I painted it black and distressed.  The baskets on the changing table shelf are from Target, the bins on the bottom from TJMaxx - both are Curver brand.


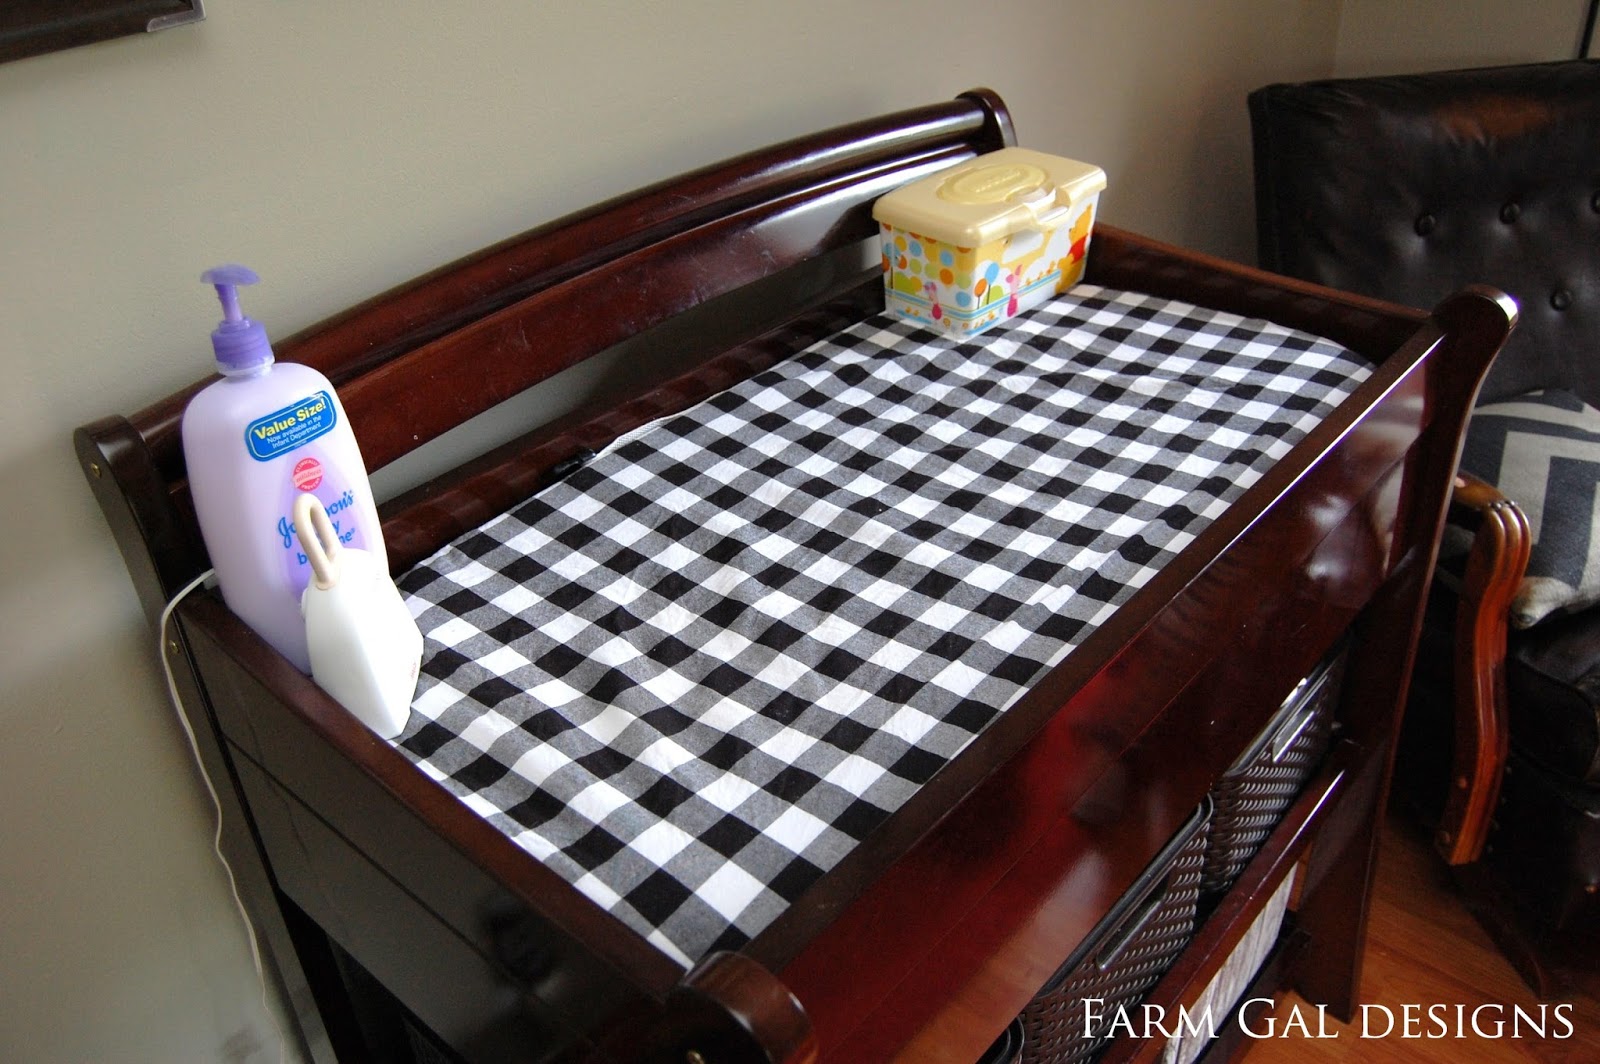
The changing pad cover is one I made from large buffalo check fabric.  I tried to improvise, and it took me three tries to get it right.  I should have just followed the tutorials I read instead of trying to be cool and do it my own way.


Curtains I made from white linen-look fabric.  The curtain rods are EMT electrical conduit and wood craft finials I spray painted ORB.  The blinds are fruitwood ones from Home Depot, and the wall lamp is from Lowes.  Rug and ottoman are from Target.


 I had planned to do a large rustic map art over the crib, but I haven't finished it yet.  So for now the TJMaxx art hangs over the end of the crib.  I made the crib skirt and sheet.  The sheet is black and white hounds tooth; I also have one with cows on it.


I should have taken photos of the closet, but I was lazy.  I painted out all the shelving while I was pregnant and added baskets.  His clothes are so cute hanging on the tiny little hangers inside.  I didn't style the bookshelf - the top shelf is stuffed full of newborn cloth diapers he's outgrown.  One of these days I'll get a tote and put them in the storage room.


 This hook was a wedding present from some friends, and now it holds little ball caps in the little corner between the closet and window.  It's just a cute detail that makes me happy.

I'm pretty proud of this nursery; I feel like it's my best room yet.  There are things I'd like to tweak/add, but I pretty much did it all myself while I was pregnant with William, and I adore this room.  I think it is a good take on my original mood board, and if the boys ever need to share a room I think the decor from Will's room and Sam's room will blend really well with each other.

*Crib and changing table we had from when Sam was a baby - they are Delta Martine collection.  And the bookshelf is from Target.


Sunday, August 26, 2012

Family Room Updates


Well, the intent of this post was to link up with a blog party a week ago, but seeing as how I can barely keep us in clean clothes and dishes these days, I'm just going to post it now by myself.  

I haven't really posted any before or afters of our house on here.  We bought our house from a family member, and that can be a sensitive situation when you start completely redoing things.  But it's been almost two years since we got the keys, and I want to begin showing some of our progress.  Pretty much none of the rooms are completely finished yet, but we've made significant progress on most of them.  

Our family room/playroom is open to the kitchen (it's one long bowling alley room).  We have a bigger TV and our nice couch in the basement den, but we spend a lot of time in here (probably because of the toys).  

Here is the before – the day we got the keys.  You walk in our back door at the kitchen and see the family room beyond.   
And here it is just a few weeks ago when it was all clean for company. 
Basically I have found everything for this room because our existing (good) couch from our old house is downstairs in the basement with the big TV.  Accumulating furniture is an adventure when you go from 900 sqft to roughly 3400 sqft.  My final vision is to ditch the green accents have it be white, beige, chocolate, wood tones, with red accents and the occasional touch of orange, aqua, and yellow.

Things we have done:
  • Painted the walls (twice, first time just to get rid of the green, second time once I finally figured out what color I wanted).  They are currently Valspar’s Moose Mousse. 
  •  Built the toy storage shelves from this Ana White plan, modifying slightly to fit my existing baskets.  They are painted Martha Stewart’s Glass of Milk.
  • Got a hand-me-down loveseat (it was free)
  •  Bought a wingback recliner at Goodwill for $11 
  • Got my old play table and chairs from Mom & Dad’s basement for Sam to use 
  • Painted an old frame we had and added a chalkboard to it (plywood painted with chalkboard paint)
  • Removed vertical blinds and shelf and added fruitwood blinds from Home Depot 
  • Sewed proper curtains from white linen-look fabric after using twin sheets as curtains 
  • Painted a Goodwill end table red – it works for now 
  • Since the pictures, we removed the fluorescent light and added a ceiling fan with light – it helps with air circulation immensely, and no more fluorescent humming!
What I still want/need to do:
  • Move the pictures on the end wall down a few inches – yes, after I just filled holes, painted, and drilled new holes and anchors for them a month ago.  I am nothing if not intelligent.  Actually, I didn’t have a problem with their height until we installed the ceiling fan and it cut off the view of the top of the clock.  And update the pictures in the frames.  
  • Get an IKEA sofa to replace the loveseat (in white slipcover) 
  • Reupholster the wingback in drop cloth with red feed sack stripes similar to this Pottery Barn chair (they don't have the feedsack stripe available anymore).  I'm terrified to do it myself but have read that it would cost WAY too much to have it done for me.
  • Get a rug.  I’m having trouble deciding what size – do we really need an 8x10 or could we get by with a 5x7?  The room is narrow (maybe 12w x16L "ish"), and really I just want a cushy space for playing with toys on the floor.  
  • Stencil the curtains with this stencil from Royal Design Studio.  I saw some “text” and “poem” curtains on blogs but know I would never be able to keep my handwriting that neat or stable.  I’m going to wait until I get a few other things done first though so I can make sure I still want the stencil later on. 
  • Paint the end table by the wingback.  It’s an old end table/magazine rack that has been at my parents’ house as long as I remember.  But it has dings and I think the beaded trim would show off better painted a robin’s egg blue and distressed.  
  • Once we get the sofa, build/find end tables to go on either end.  That’ll mean moving the kiddie table, which is fine.  Everything in this room is basically in a state of flux. 
  • Eventually, at some point long down the road, I would love to build a faux corner fireplace and mount a flat-screen TV on top.  I’d use the open space at the bottom for a toy basket or seasonal décor.  I am convinced it would look fantastic from both the front and back doors (you see that corner from both).  Convincing hubby will take a few years.  
  • One day (in my dreams) I’d love to knock the wall behind the sofa into a half wall with a column at the far end.  It would look into the stairwell then.  I just feel like it would open up the room that much more and make it feel less narrow, aid with air circulation and all that.
That looks like a long list, but I think it’s mostly my oversharing details.  I tend to do that.  Seriously, it’s a far cry from just last summer when the only things in the room were my college TV (which has since died), a swivel rocker (in another room now), toy baskets on the floor, and the kiddie table and chairs.  While it’s not my final vision yet, it’s definitely coming along and at least looks halfway presentable now.  Not too shabby, no?

Wednesday, May 9, 2012

Revamped Photo Plaque Tutorial

I was finally able to do this project - the pieces have been sitting around for a good while.  I revamped an old art plaque I found at the thrift store.  It's not really worth a tutorial, but here's what I did.

Find an old art plaque at the thrift store - I forgot to take a before picture, but this square one was $0.75, and the one I used was $0.55.
Dampen and scrape off the art.  Mine was a card stock type material.

Sand lightly to scuff, and spray paint the color of your choice.  I used flat black because  my photo was black and white.  Distress if desired.

Cut photo to fit plaque.

Apply a layer of Mod Podge to the plaque and to the back of your photo.  Place photo on plaque, smooth to get rid of bubbles.  Apply Mod Podge over top of the photo and plaque to seal everything.

I'm one step closer to finishing my gallery wall!

Sunday, August 7, 2011

Bloggy Update

It seems to get harder and harder to update the blog these days.  Life is just that, life, and our temporary no computer at home situation has gone on longer than expected, so posts have been infrequent and sporadic (and will continue to be for a while longer). 

But here's what I've been working on over the past while . . .

One set of curtains for our master bedroom (still trying to find the material for the other set)
 A pirate pillow (fabric is P. Kauffman)
 Other pillows of which I have no pictures

Cheese dome cloche from House of Hepworths via Thrifty Decor Chick
Artwork holders for the playroom
Spray painted yard sale boxes (that I still need to make cute labels for)
Note the before below . . .
 Random quilt piecing

And some other not-yet-finished projects involving this big pile o' wood


Monday, June 6, 2011

Yard Sale Goodies

A set of stacking metal boxes . . . the bodies of the boxes will get painted - dark red, cream?  I haven't decided yet.
A bag of berry vines - to use in wreaths, wind around styrofoam balls and put in a bowl, or stick in a pitcher in the guest room . . .
Sand/beach toys

Two books for the Little One


Saturday, June 4, 2011

My First Antique Purchases

I like antiques.  I don't necessarily want my home filled with rickety/priceless but untouchable things, but I like incorporating solid pieces or adding little accents.  I kind of see my style as updated farmhouse, not too country but not "modern."  Cozy and welcoming.  Homey. 

I got these two pieces from the antique mall near work. 
My tobacco basket:
And my antique quilt rack, which was so different and much more "me" than most I've seen.


Thursday, June 2, 2011

Spray Paint Fixes Everything

I don't have a before picture, but some outdoor ORB spray paint took this yucky, old, rusty metal pole from drab to fab (the planter helps a little too).

Sunday, May 29, 2011

Dining Room Curtains

These have only been on my to-do list for months and have been sitting around partially completed, but after this last quilt, I was determined to finish them.  A couple of nights of pressing seam allowances and sewing twill tabs for the back, and my dining room curtains are done!  Of course, now it looks like I need to repaint the walls, among other things.  But hey, it's a step towards my vision, and my curtain rod isn't naked anymore!


LinkWithin

Related Posts Plugin for WordPress, Blogger...