Showing posts with label Thrifting. Show all posts

Sunday, March 16, 2014

Monkey Butt (Baby) Pants

I’ve been wanting to make some monkey butt pants for Will for a while.  I’ve seen them on cloth diapering message boards, found and downloaded a pattern (in Japanese), have researched them more. 

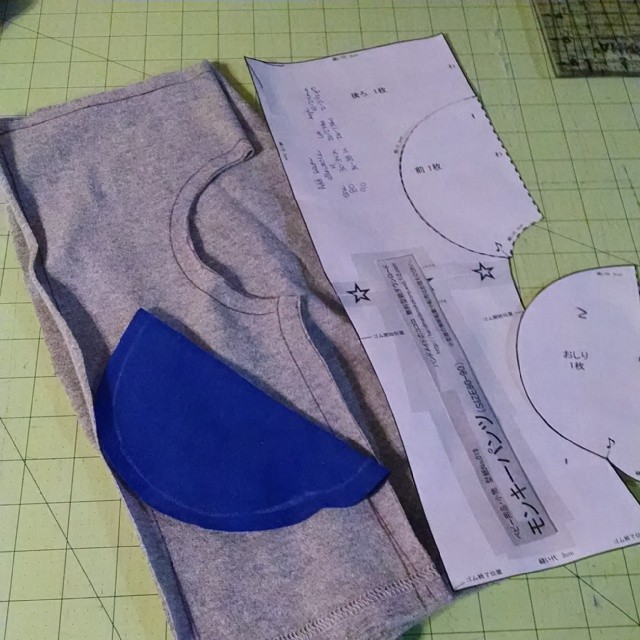
Last week I couldn’t take it anymore – I’d been researching cute boy clothes – and got the pattern cut out and assembled.  I snagged a few t-shirts at the thrift store and Friday night I was off and running.  I hadn’t sewn much during the week, and I just needed something easy, an instant gratification project.  I’d say it took me as long to cut out the pattern and fabric and find my elastic as it did to sew the pants.  So cute!
These are size 80-90mm (12-24 months).  With this particular pattern you have to add seam allowances.  I used this old t-shirt and have plenty left for a coordinating top or another pair of pants.  I made sure to use the hem of the shirt so I didn’t have to hem the little leg openings.  The waistband is 1” elastic.  Oh, and I made the legs straight instead of slightly flared – they look like skinnies if you want that look!
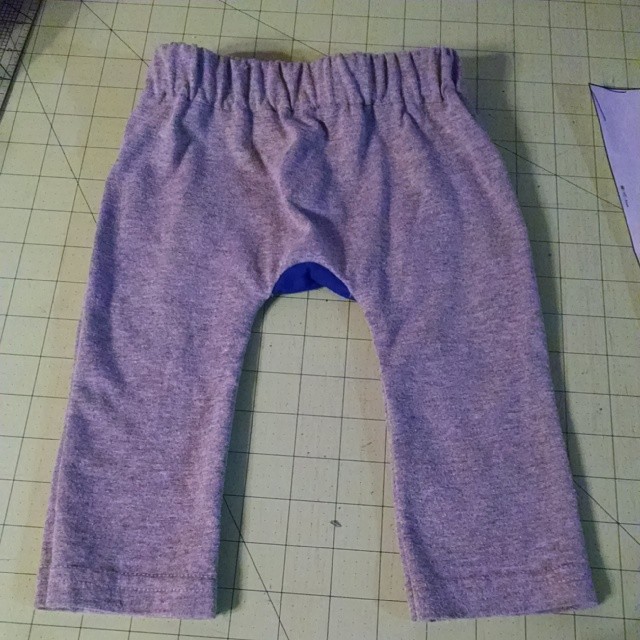
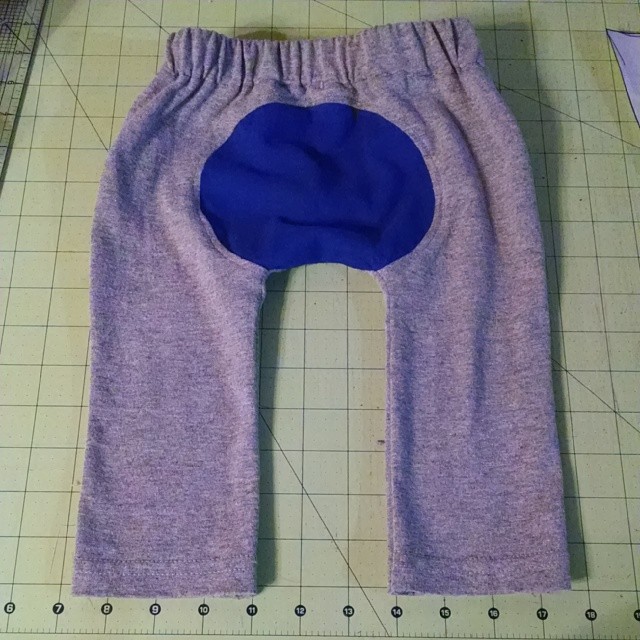
This is the back side finished.
All sewn together (but the model was long in bed by that time).  
My Saturday morning photo shoot didn’t work so well – he wouldn’t stop to pose!   
**Note – these pictures are in disposable diapers since we were fighting some nasty diaper rash brought on by antibiotics (yay ear infections! – not).   

The back fit great but the front had lots of extra fabric, so I’d alter the pattern if we were a disposables-only household.  For reference, the model is just about to turn a year old, wears 12M clothes (but has short legs), and is 19lbs and change.
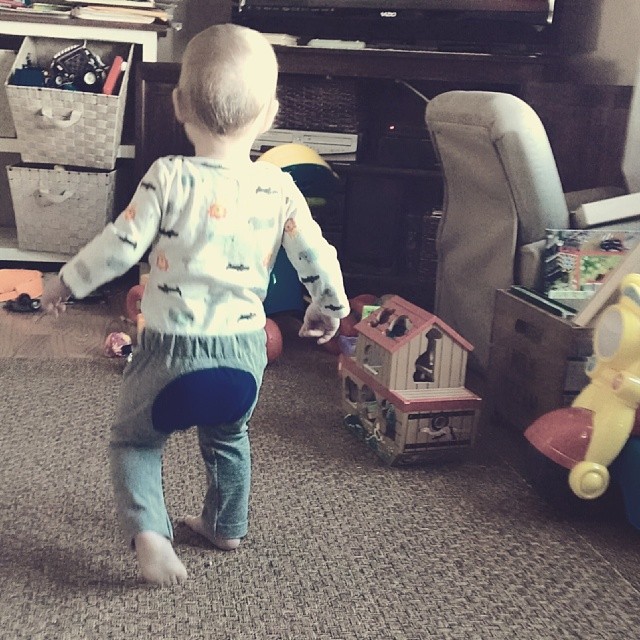

My husband thinks they are dumb and doesn’t believe they are all the rage (obviously he doesn’t frequent cloth diaper boards, blogs, or Etsy).  My mom thinks they are adorable. 

I need to bribe the model to wear them again so I can see how they fit now that we’re back to our cloth diapers. 

This is the link to the pattern, but there are no instructions.  There are construction tutorials if you search for monkey butt pants.  But basically you sew the insert into the back side, sew the sides together, then make a casing for an elastic waistband, and hem.  Very doable, and if you reuse old t-shirts or fleeces, very inexpensive. 

Next up (when I get the urge), I’m trying this German pattern (with instructions here – the last several pages are pictures of completed pants).  Children’s size conversion chart here – you’ll need it.  There are lots of possibilities with monkey butt pants – I want to try some fleece ones for winter and maybe try to make some in wovens (with a little extra room since they won’t stretch).    

Saturday, January 12, 2013

Sam's "Big Boy" Quilt

Since he is going to be a big brother and is getting a new room and twin bed, I figured his 36"x42" baby quilt wasn't going to cut it anymore.  So I made my sweet boy a "big boy" quilt.  The plaids are almost all from deconstructed thrift store shirts, a la Bonnie Hunter.  There are two small pieces that I bought to finish out those last few squares. 
The blocks are 6"x6" and 6"x9" finished, laid out alternating.  I originally was just going to outline quilt each one, but it wasn't enough, so I added more, and then more until it felt right.  The quilting is not perfect, and the basting wasn't either.  The backing fabric has a homespun feel to it and stretched some, so there are a couple spots where it bunched when I was quilting.  (Boo!)  But it is done, and I figure being my son I'll have another chance to make him a quilt. 

I do love the backing and especially the binding fabrics - I found them at my local quilt shop.  I took the top in and played with several fabrics against it.  I always end up finding the perfect combos there, and they are always the most unexpected. 
The quilt finishes at about 75"x96" - definitely big enough for his new twin bed.

Thursday, November 22, 2012

A new quilt

It's Thanksgiving morning at 7am, and I am enjoying a little sewing time.  My hubby and brother are out hunting, Sam is still asleep, and I am working on Sam's "big boy" quilt.  It's inspired by this one from Pottery Barn Kids:

I am a big fan of Bonnie Hunter and her thrifty quilting ways, so I took an idea from her and scoured the thrift stores of 100% cotton plaid shirts in reds, oranges, and browns.  My pattern isn't quite as random as the PB bedding; I just alternated 6" squares with 6x9" rectangles.  I'm making a twin size, so I have 16 rows in my quilt.  As of this morning, I am a quarter done with the top:
Those are rows, but they only fit on the design wall vertically.  I was nervous laying it out and when I began sewing, but I think it'll turn out alright.  If I had it to do over again, I think I would leave out the lighter blocks and have it just be the more saturated prints.  At this point, I'm soldiering on and trying to knock it out, because I have a baby quilt, burp cloths, cloth diapers, and all kinds of other sewing and home projects I want to get done in the next couple months. 


Saturday, May 26, 2012

Yard Sale Finds

I headed out this morning, and it just so happened to be a great day yard saling.  There were a TON of people out and I guess not as many sales as usual, but I still grabbed a few things:
 The wire freezer baskets ($2 each) I will use in our basement bath under the sink for toiletries or towels (hoping to build an open vanity in there when we get around to working on it).  I found four pairs of shorts for Sam at $2 each, all brand names (Ralph Lauren, Children's Place, and Gymboree).  And this bench from an estate yard sale.  This is a true before, all dusty and dirty and with the nasty cushion.  I actually like the side without the arm better, but I haven't decided whether to go armless yet.  If I do, the pieces are there to fix it if I change my mind.
 I couldn't help it, it was love at first sight with that back and the idea of refinishing her with the other old chairs I have to go around our dining room table.  I did wipe her down before bringing the frame inside - that cushion is staying outside and will probably be disassembled for parts for a new seat.  It's amazing what people store in an old barn.  I called Mike and he told me no more than $30 when she had come down to $35.  I drove back at the end of my stops and she had raised the price after going through things some more but honored the $35 offer from earlier.  It'll definitely be a lot of work to get her fixed up, but once I wiped her down I was amazed how pretty the wood looked under all that dust.  And she just barely fit in the Escape; we had to do some maneuvering.
And 20 half-gallon mason jars (Ball, H over A Atlas, and Kerr) to use in my brother's wedding and then to can with.  $0.50 each because I took them all.

Now I need to clean and get some things done around here.  I've already vacuumed my entire car (I wanted to get that dirt out from the bench and ended up doing the whole thing). 

Wednesday, May 9, 2012

Revamped Photo Plaque Tutorial

I was finally able to do this project - the pieces have been sitting around for a good while.  I revamped an old art plaque I found at the thrift store.  It's not really worth a tutorial, but here's what I did.

Find an old art plaque at the thrift store - I forgot to take a before picture, but this square one was $0.75, and the one I used was $0.55.
Dampen and scrape off the art.  Mine was a card stock type material.

Sand lightly to scuff, and spray paint the color of your choice.  I used flat black because  my photo was black and white.  Distress if desired.

Cut photo to fit plaque.

Apply a layer of Mod Podge to the plaque and to the back of your photo.  Place photo on plaque, smooth to get rid of bubbles.  Apply Mod Podge over top of the photo and plaque to seal everything.

I'm one step closer to finishing my gallery wall!

Tuesday, July 12, 2011

Shameless Copy

I’ll admit it.  I thought Thrifty Décor Chick’s spray painted Mason jar was fantastic, so I copied it. 
And then there’s this guy - the milk jug I got at Goodwill.
I forgot to take a picture of him in his “before” state, but he was Ugg-ly.
For some reason, he reminded me of the cute white ceramic vases I have seen around, so I bought him.  And spray painted him glossy white. 
I thought he was happy, but about 2 weeks after this picture was taken (hush, you know I’m living under a rock right now) when I went to change out the flowers, I found the paint bubbling and peeling off.  *Sigh*  I know he was cheap, but I don’t want to throw him away, so I’m going to (somehow) get the paint off him, spray his insides good with a water sealer, and redo him, with the addition of a glossy topcoat (so he really shines).  

A couple of things I have learned from this vignette:
  • When spray painting glass, frosted glass spray paint is your friend.  Do a coat of it first, then spray your color.  Otherwise, no matter how light I tried to spray, I still got runs in my paint (don’t look too close at that Mason jar). 
  • Always coat the inside of any suspect container (even glazed ones that look fine) with a water sealer.  Or you will have a Mr. Milk Jug problem on your hands.

Monday, June 6, 2011

Yard Sale Goodies

A set of stacking metal boxes . . . the bodies of the boxes will get painted - dark red, cream?  I haven't decided yet.
A bag of berry vines - to use in wreaths, wind around styrofoam balls and put in a bowl, or stick in a pitcher in the guest room . . .
Sand/beach toys

Two books for the Little One


Saturday, April 23, 2011

Faux Egg Vase Filler

Everyone seems to be doing it this spring - making Pottery Barn Knockoff egg vase filler.  Here is my version.
I started off with some Dollar Tree foam eggs - the glittery ones with ribbons for hanging.  I got two dozen ($2).
 
Then I went through a very scientific process involving dipping the eggs into sample jars of paint and hanging them on unbent wire clothes hangers across our step ladder (with cardboard underneath to catch drips).  I bought the blue but had the cream and brown/tan on hand already.
Two coats later, I cut off the ribbons, put all the eggs in a box, and flicked some brown craft paint on them (using a little paint brush and my finger - it was messy).  

Voila!  Faux egg vase filler.  Not too bad for $5 in supplies.  I think they go just fine with my larger Kroger eggs and my thrift store apothecary jars and bunny.


Monday, March 21, 2011

Goodwill Finds

I love Goodwill, especially now that I am decorating on a budget.  I love the thrill of finding something great for cheap.  It's how I was raised.
The basket reminded me of a post on flower arrangements that I had read on A Soft Place to Land.  The raffia is too light, so I'm going to try my hand at staining it (testing colors on an inconspicuous spot first).  Then I'll fill it with pint sized mason jars and flowers and display it in my dining room.  Cost: $2.95
The teeny wicker sleigh caught my eye, and I thought with some white spray paint (spray paint is my new BFF, but fabric's still my old) it would be so cute in the guest room filled with pink and silver ornaments at Christmas.  Cost: $0.95
The three frames are all plastic, but a little primer and spray paint and they'll be pretty and ready for family photos on my gallery wall-in-progress.  Cost: $2.35
 Some days you find nothing; some days are golden.  I always have a list in mind of things I'm looking for . . . so stay tuned for what I find next.

LinkWithin

Related Posts Plugin for WordPress, Blogger...